Materials:
-1/2-1 yard of (woven) fabric. I used about 1/2 yard.
-1" wide elastic. I recommend knit non-roll elastic for the waistband.
I used this cool flower print from Joann for my skirt:


First, measure around your waist (or wherever you want your skirt to sit) with your elastic, and cut it to that size. Make sure it is slightly loose, because you'll want some room for sewing the ends together and still have a comfortable fit. It's a good idea to have more elastic than you need because you can always make it smaller. Then, measure from your waist down, however long you want your skirt to be.
Now for the cutting. Take your waist measurement and double it. This will be the width of your skirt. If you don't have enough fabric for it to be doubled, it'll still work as long as the width is longer than the elastic. I used the whole width of my fabric, 54".

Next, take your length measurement and add at least three inches to it. The skirt will be hemmed, and you'll make a casing for the elastic, so it's better to have more than less. Mine was about 24".

Cut out a rectangle using your width and length measurements. Mine measured 24 by 54 inches. I kept the selvage on, because it added to the length (and I accidentally cut from the wrong side).

Next, cut this in half. If you only want one seam, or don't want pockets, you can leave it as one piece.
Now for the pockets. Cut out four pocket shapes out of the leftover fabric, folded in half so there are two pairs of mirrored pocket pieces. To make them, you can just loosely trace a shape around your hand, to make sure it fits.

Next, take one skirt piece and a pair of pocket pieces. Take each pocket piece and sew them to each side of the skirt piece, with right sides together. Place them about 5-7 inches from the top, because a couple will be subtracted from the length because of the casing. Do this for both skirt pieces.

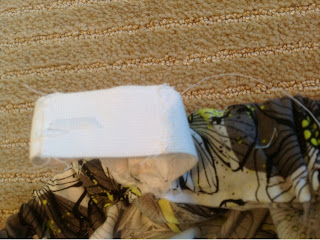
Press the pockets outwards so the right sides are up. You'll get something like this on each piece.

Then, pin the sides of the skirts right sides together, making sure the pockets are aligned. You'll sew up the sides, going around the edges of the pocket, like this: (if you aren't doing pockets, just sew up the whole side.)

Turn your skirt right side out, keeping the pockets inside. Press, and you're almost done!

For the casing, fold over the top a little more than an inch inside the skirt, and again to make the casing. Sew this down, not too far from the edge, making sure there's enough room for the elastic to fit. Leave a couple of inches to slip the elastic inside. If you're like me, and the tops of your skirt seams aren't sewn together, and you forgot to leave room, you can just use that as the opening for your elastic.
Pin one end of the elastic to the skirt to make sure it doesn't get pulled into the casing, and attach a safety pin to the other end to help push it through. If you don't have a safety pin, just use a paperclip and some tape. Now inch the elastic through the casing, and pull both ends out.

Sew the ends together with a zigzag stitch, nice and tight. Before you do this, you might want to try your skirt on while holding the ends of the elastic together to see if it's tight or loose enough.

Push the elastic back into the casing and close up the opening. Sew the elastic to the casing in one or two spots so it doesn't twist or move around.
Fold over the bottom a couple of times, hem, and you're done! Now you have a cool, gathered skirt with pockets!

This is my first tutorial (and homemade skirt!), so I hope you liked it. Feel free to ask questions or tell me how it turned out. Happy sewing!
